Walkthrough: Upload Directive
In this walkthrough, we are going to create a directive that turns its host element into a drop target for files.
Our directive itself does not upload files to a server, but instead, it is going to be responsible for detecting dropped Files and raising special DOM events. Other parts of the application (components, directives, services) can then react on those events and perform additional actions if needed.
Let's start by generating a new application and calling it app-upload-directive:
ng new app-upload-directive
cd app-upload-directive/
You can test application was created successfully by running it with the default browser:
ng serve --open
Now let's create an upload directive from the Angular CLI blueprint:
ng g directive directives/upload
The ng tool should put the code and unit tests into the src/app/directives folder,
and should also update main application module.
installing directive
  create src/app/directives/upload.directive.spec.ts
  create src/app/directives/upload.directive.ts
  update src/app/app.module.ts
Angular CLI generates the following code for the new directive:
// upload.directive.ts

import { Directive } from '@angular/core';

@Directive({
  selector: '[appUpload]'
})
export class UploadDirective {

  constructor() { }

}
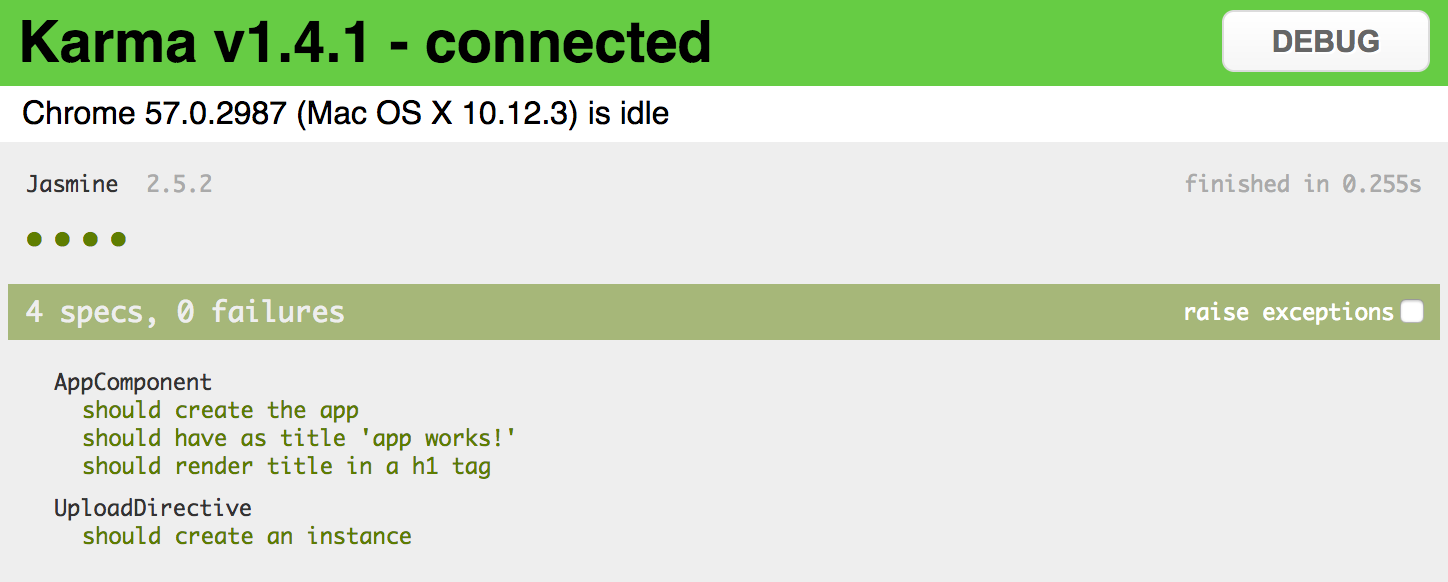
All application and directive tests should be working properly
ng test
There should be an additional test for UploadDirective class: should create an instance.
This test is a good starting point for unit testing your future directive.
We are going to decorate a simple <div> element and turn it into a file drop area.
<!-- app.component.html -->

<h1>
  {{title}}
</h1>

<div class="my-drop-area">
  <span>Drop your files here...</span>
</div>
As it is a <div> element let's add some style to be able distinguishing it.
Setting fixed size and background colour should be more than enough for now.
/* app.component.css */

.my-drop-area {
  width: 150px;
  height: 50px;
  background-color: lightgray;
}
The main application page now should look like the following:

// upload.directive.ts

import { /*...,*/ HostBinding, HostListener } from '@angular/core';

export class UploadDirective {

    @HostBinding('class.app-upload__dragover')
    isDragOver: boolean;

}
Every time isDragOver becomes true the host element gets a CSS class app-upload__dragover applied to it.
Once it is set back to false the CSS class is automatically removed.
Now add the following code to the directive implementation:
// upload.directive.ts

@HostListener('dragenter')
onDragEnter() {
  this.isDragOver = true;
}

@HostListener('dragover', ['$event'])
onDragOver(event: Event) {
  if (event) {
    event.preventDefault();
  }
  this.isDragOver = true;
}

@HostListener('dragleave')
onDragLeave() {
  this.isDragOver = false;
}
The code above performs a simple drag management to update isDragOver state and so host element style.
For dragenter and dragover events we are going to enable additional styles, and disable on dragleave.
In order to turn host element into a drop zone you also need handling drop event:
// upload.directive.ts

@HostListener('drop', ['$event'])
onDrop(event: DragEvent) {
  event.preventDefault();
  event.stopPropagation();
  this.isDragOver = false;
}
Keep in mind that directive only adds app-upload__dragover class to the host element,
it does not modify element's style attributes directly.
Developers that are using your directive should be able to define look and feel of the decorated element at the application level.
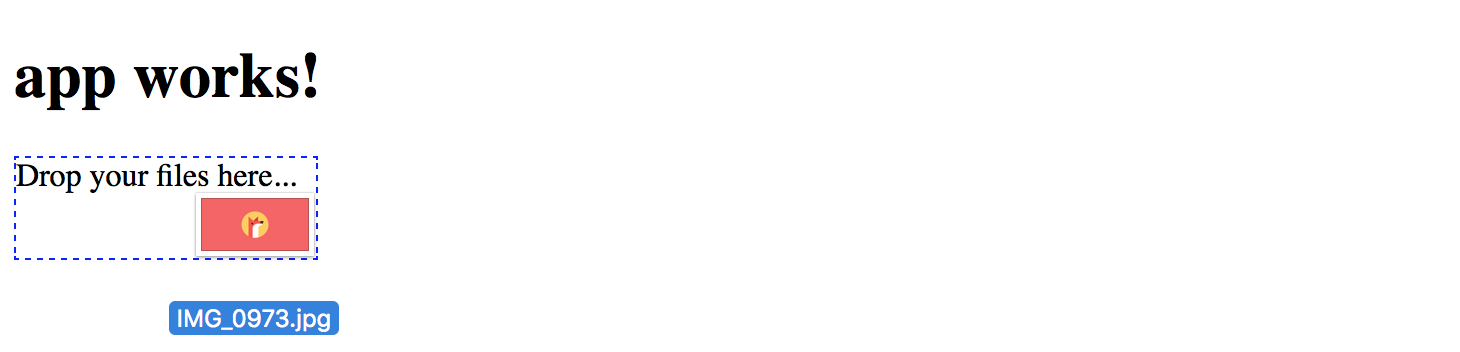
Traditionally file drop areas use dashed borders when being dragged over, let's make our element draw a thin blue border and also change background colour:
/* app.component.css */

.app-upload__dragover {
  border: 1px dashed blue;
  background-color: white;
}
And you need decorating div element with the directive to see it in action:
<!-- app.component.html -->

<div class="my-drop-area" appUpload>
  <span>Drop your files here...</span>
</div>
The element should be changing the style when you drag a file over its area:
Now that we have drag events wired with element styles, it is time to implement drop handling.
Find the onDrop method we have introduced earlier and replace with the following code:
// upload.directive.ts

@HostListener('drop', ['$event'])
onDrop(event: DragEvent) {
  event.preventDefault();
  event.stopPropagation();
  this.isDragOver = false;

  const files = this.collectFiles(event.dataTransfer);
  console.log(files);
  this.onFilesDropped(files);
}
Once user drops files on the host element, the directive is going extract information on files from the DataTransfer instance (collectFiles),
and pass discovered files to the onFilesDropped method to raise corresponding DOM events.
DataTransfer
The DataTransfer object is used to hold the data that is being dragged during a drag and drop operation. It may hold one or more data items, each of one or more data types.
For more information see DataTransfer article.
Essentially we need to extract File objects into a separate collection in a safe manner:
// upload.directive.ts

private collectFiles(dataTransfer: DataTransfer): File[] {
    const result: File[] = [];

    if (dataTransfer) {
      const items: FileList = dataTransfer.files;

      if (items && items.length > 0) {
        for (let i = 0; i < items.length; i++) {
          result.push(items[i]);
        }
      }
    }

    return result;
}
Finally, we need to raise an upload-files event to allow other components handling it.
We are going to create an instance of the CustomEvent for that purpose.
CustomEvent
The CustomEvent interface represents events initialized by an application for any purpose.
For more information see CustomEvent article.
The directive also needs access to the native DOM element of the host to raise a custom event,
so importing ElementRef instance for the constructor is required.
Reference to the native HTML element should be injected as a constructor parameter and used as private property el.
// upload.directive.ts

import { /*...,*/ ElementRef } from '@angular/core';

export class UploadDirective {
    // ...

    constructor(private el: ElementRef) {}

    // ...
}
You need using Element.dispatchEvent() to raise the upload-files event.
As part of the CustomEvent interface, we can define custom detail value,
so that external event handlers can get additional information.
We are going to provide an object containing a list of files (files) the user has dropped on the host element,
and reference to the directive (sender) instance that raised the event.
// upload.directive.ts
private onFilesDropped(files: File[]) {
    if (files && files.length > 0) {
        this.el.nativeElement.dispatchEvent(
            new CustomEvent('upload-files', {
                detail: {
                    sender: this,
                    files: files
                },
                bubbles: true
            })
        );
    }
}
Note the bubbles property being set to true to enable event bubbling.
It indicates whether the given event bubbles up through the DOM or not.
In our case we allow any HTML element up the visual tree handle this event or stop its propagation.
You can get more details on custom events in the article Creating and triggering events.
Now it is time to handle upload-files event at the application level.
Open the app.component.html file and add onUploadFiles event handler like shown below:
<!-- app.component.html -->

<div class="my-drop-area" appUpload (upload-files)="onUploadFiles($event)">
  <span>Drop your files here...</span>
</div>
Given that our event supports bubbling any element in the parent hierarchy can handle it. You could also define the handler as following:
<!-- app.component.html -->

<div (upload-files)="onUploadFiles($event)">
  <div class="my-drop-area" appUpload>
    <span>Drop your files here...</span>
  </div>
</div>
To see the content of the event, we are going to put the console.log for now:
// app.component.ts

onUploadFiles(event: CustomEvent) {
  console.log(event);
}
Now if you compile and run the web application, and drop one or multiple files on the drop are, the console output should be similar to the following one:
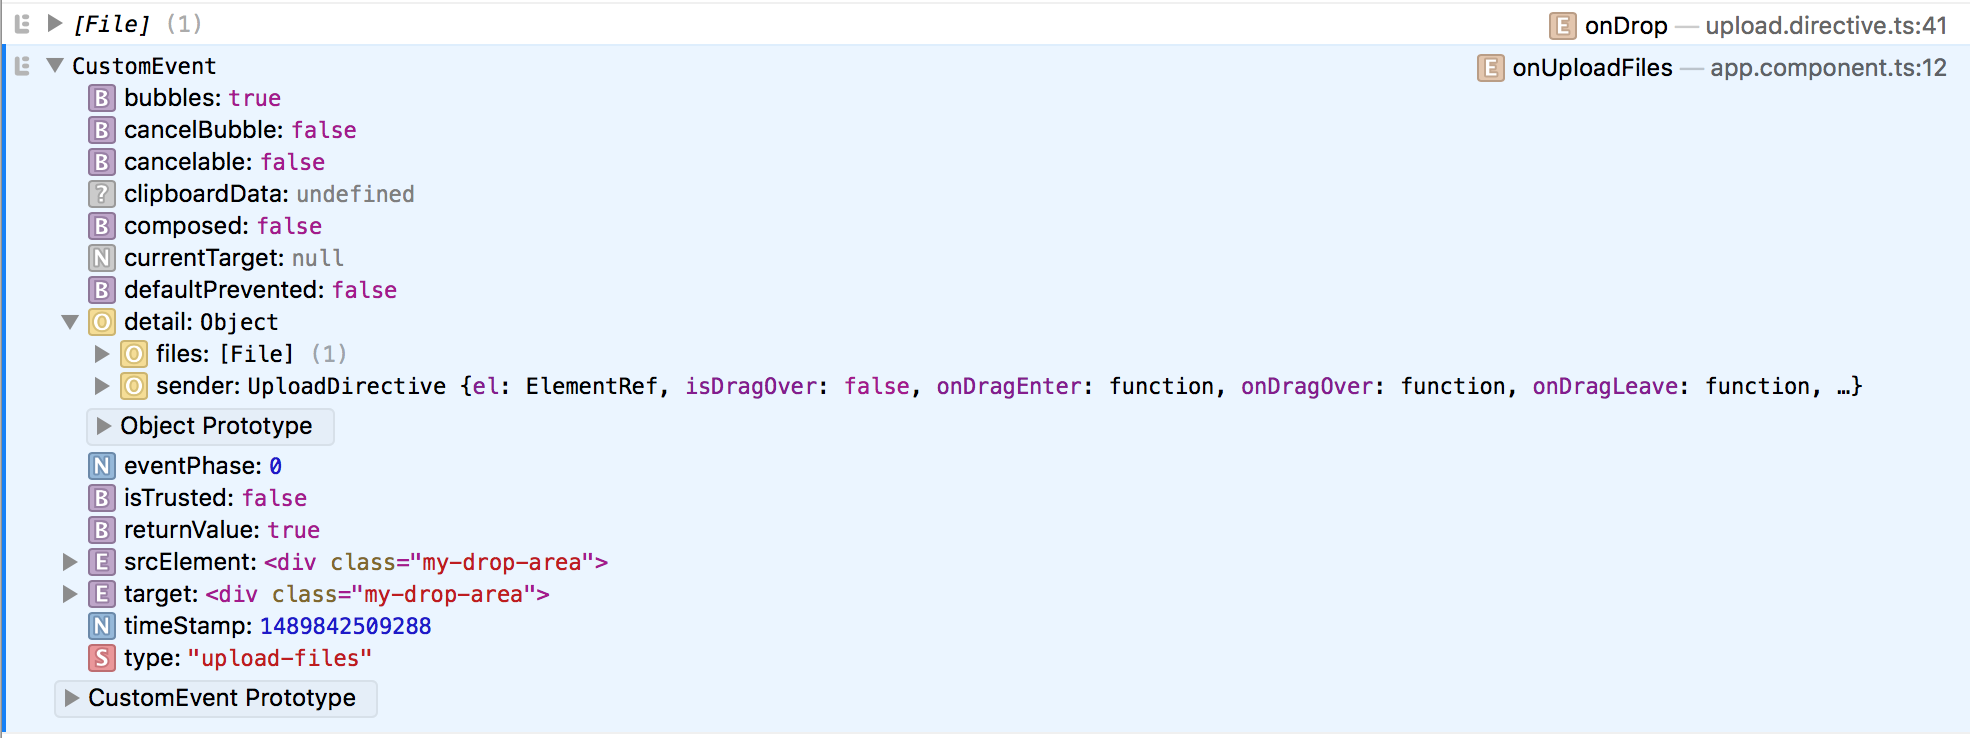
As you may see from the picture above, the handler is getting CustomEvent that holds details value
with a File collection, reference to the directive instance, and several standard properties.
Let's try adding some visualization and display a list of previously uploaded files on the main page.
Append the following HTML to the app.component.html file content:
<!-- app.component.html -->
<!-- ... -->

<div>
    <h3>Uploaded files:</h3>
    <ul>
      <li *ngFor="let file of uploadedFiles">
        {{file}}
      </li>
    </ul>
</div>
List element binds to the uploadedFiles collection holding uploaded file names.
The upload-files event handler just collects the file names and fills the collection.
// app.component.ts

export class AppComponent {
    // ...
    uploadedFiles: string[] = [];

    onUploadFiles(event: CustomEvent) {
        console.log(event);
        const files: File[] = event.detail.files;
        if (files) {
            for (const file of files) {
                this.uploadedFiles.push(file.name);
            }
        }
    }
}
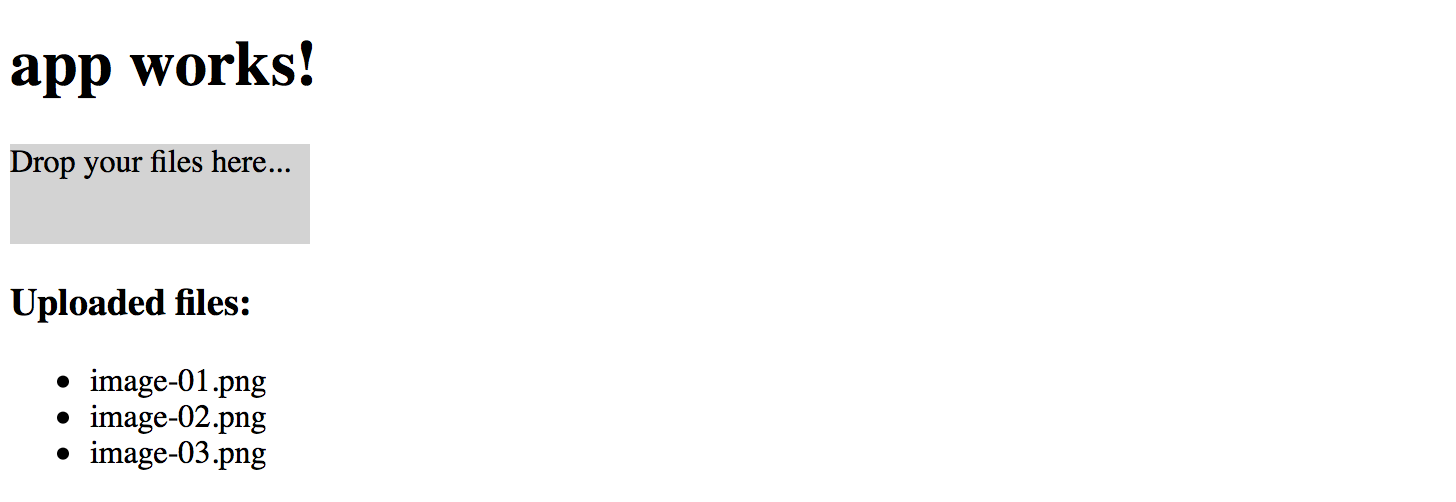
Now run your web application or switch to the browser if running the live development server, and try dropping one or multiple files several times. You should see file names appear in the list below the drop area like shown on the picture below:
Source Code
You can find the source code in the angular/directives/app-upload-directive folder.
When working on your Angular web application, you may want some other component or service handle the upload-files event
and perform actual uploading to a backend server, preferably by utilizing the injectable service.
It is always a good practice splitting functionality into small interchangeable building blocks, each doing one thing at a time.